New Release Elv Tile Splitter V2

astrogull

New member
Joined
Apr 26, 2009
Messages
29
Reaction score
1
Points
3
There is a new much approved version in OH. The old one happened to be a last minute test trial with mean borders instead of the correct ones. My apologies to everyone who used it and came to the conclusion it didn't live up to its name. I only discovered this recently. I plan to remove it from the site.

Needless to say the new V2-version does not have this flaw. So check it out here: https://www.orbithangar.com/showAddon.php?id=068e90b9-edcc-4130-851f-46edb99a5405
Bugs are always possible, but it is thoroughly tested (I hope). See the demo videos in .\Doc\Videos folder


Metafile from face has now .hdr extension.
 
Last edited:

MaxBuzz

Well-known member
Joined
Sep 19, 2016
Messages
1,402
Reaction score
2,130
Points
128
Location
Kursk
Thanks for the much needed program :thumbup:
 

astrogull

New member
Joined
Apr 26, 2009
Messages
29
Reaction score
1
Points
3
My pleasure, there is a small change added the last hour, .meta is changed to .hdr in the metafile.
 

Thinker55

Donator
Donator
Joined
Sep 20, 2015
Messages
31
Reaction score
0
Points
6
Can't wait to test!

I'm working on Wallis Island. While I had at last puzzled out some functions of the original, I'm thrilled to take a run at this new version. I've been going nuts trying to get LidarExplorer and GRASS to provide me with a decent elevation ping. If you can suggest a better source/method, I'm all ears!
 
Last edited:

Thinker55

Donator
Donator
Joined
Sep 20, 2015
Messages
31
Reaction score
0
Points
6
Okay, what am I doing wrong? I have a 16-bit grey-scale png map in size 16387 x 16387 that represents a tile at level 10, Band 18, Tile 37. It was created from a GeoTIFF map using Gimp. There is a tile at that location, but from the looks of it, it was altered in the delivered elevations and looks poor, so I would like to replace it. When I import it, the Elev Tile Splitter either decides it is a Surf tile or it generates and presents me with an image of the tile that should be at Level 11, Band 36, Tile 74! The Tile Splitter also insists on generating a color elev_mod tile, which I can fight with it over while in the creation process, but is still the wrong tile. I've tried referencing the existing tile -- no effect. What am I missing, here?
 

Thinker55

Donator
Donator
Joined
Sep 20, 2015
Messages
31
Reaction score
0
Points
6
More on the Tile Splitter

I'm still hamstrung. I decided to use the big pngs as a map for higher levels (I think I finally began to understand that piece), so I shrank the png for the tile I'm trying to replace down to 259x259. All that seems to do is give me no time to uncheck the color and elev_mod boxes and make it impossible to get greyscale and an error message that says the colormap is wrong. 16-bit pngs give me something that should be in the next level up. I've built metadata files for 8-bit greyscale pngs per the documentation, and the app INSISTS on making them color and INSISTS on making them elev_mod tiles and tells me that the colormap (set to 0 for greyscale) is wrong. Elevation settings are ignored, and end up WAY off. I've tried everything I can think of. This data was NEVER in color -- it started out as elevation GeoTIFFs. I've read the manual until I was blind. The videos are FAST -- too fast to follow. Maybe I can slow them down. But something isn't right, here!
 
Last edited:

astrogull

New member
Joined
Apr 26, 2009
Messages
29
Reaction score
1
Points
3
Wallis island

I suppose it is a height map, so you want it converted to an elev map
Here is an example of a 3x3 png map with the hdr metafile (remove .txt extension). Also an hdr file for a 64x64 map (16387x16387). Read it with notepad. The vmin, vmax are important. Sorry that the png file is changed to jpg after upload, so also here in a zip file

It seems you dragged the image in centre field. Then it stays an image and can only be exported as dds. Because it has no alpha channel (transparency) the program sees it as a surface map. You must use Import PNG under tab File.

First enter the emin-emax values (vmin-vmax in the hdr file) for your png map and check Stretch-Unstretch. Then Under tab File Import from PNG, etc.

You can skip the Stretch to see what the original emin-max values are in your map (here -32768 t0 32767, black and white). Once you have the elev map use Scale from Reference to scale it to the emin-emax you want (if you want to change them). In that case after you have the unstretched elev map, drag it into centre field and Reference tile field, enter emin-emax values. Check Scale from Reference and check Write, nothing else, then press Start button next to Write
The results can be found in the Elvdata and elvdata\Elev folder in the folder where Elv Tile Splitter is stored.
 

Attachments

  • Map10b29t36w3h3.png.hdr.txt
    190 bytes · Views: 7
  • Map10b0t0w64h64.png.hdr.txt
    196 bytes · Views: 17
  • Map10b29t36w3h3.jpg
    Map10b29t36w3h3.jpg
    40.6 KB · Views: 13
  • Map10b29t36w3h3.zip
    773.6 KB · Views: 9
Last edited:

Thinker55

Donator
Donator
Joined
Sep 20, 2015
Messages
31
Reaction score
0
Points
6
Tile splitter issues

My thanks for your response. Is there any way to avoid automatic change to color? I'm providing a greyscale elevation map and it's outputting color. And again, weirdly, if I provide a 16-bit file, I don't get the current tile, I get the one in the top left corner of the next level up. I will try to send you some screenshots so you see settings and result. The 16-bit piece is just weird.
I did learn not to drag and drop and used the hdr file -- but...
I have been creating hdr files -- I did it in the hopes of avoiding color and setting vmin and vmax and having them take. No luck.
So, in step1.pdf is my start point. I followed the instructions in your reply.
The map is attached, full-size, at 259x259x16-bit. The hdr file is attached. I discovered the conversation with Face and went to .hdr.
result.pdf is what I get. It's in color -- which I didn't ask for or want. It's supposedly an elev_mod file, which, again, I didn't want, as I want to replace the existing poor map. (I have this in 16387X16387x16 bits, and want to use that map for higher level tiles). The result is actually tile 11b36t74.elv, not 10b18t37.elv. Do you see the issue? Can you tell me what I did wrong?
8-bit images at least get represented as the proper tile, but elevation settings don't take and I get artifacts as seen in the 8-bit_result.pdf. Shouldn't I be able to save the elv file with the save button below it?

So, the short questions:
Why does 16-bit import end up producing the wrong tile?
Why is it always automatically in color?
What do I do about the artifacts in the 8-bit tile?
Why are elevation settings in the hdr file and in emin and emax in the program ignored?
Is there a way to avoid automatically creating an elev_mod tile when there is an existing tile there already?

I used elev2png.exe and with some tuning finally got a decent tile -- but if I need to stitch it or whatever, I don't know how to get the program to recognize it, even though it is in place in the exported tree structure referenced as exported by treeman. I have to assume that Elv Tile Splitter reads the tiles directly from the archive and not the extacted files (which is neat, but I don't see where I'm managing to save tiles back to the archive, as the save button hasn't been lit up yet...)

Again, thank you for your time and patience. I've spent several days on this and I just can't seem to get it to produce expected results. It may be my inputs -- if so, I'd appreciate it if you could advise me. These were created from USGS greyscale DEM GeoTIFFs, put together using OSGeo4W and sized and trimmed in Gimp 2.10.20.
 

Attachments

  • E10B18T37P16.png
    E10B18T37P16.png
    49.7 KB · Views: 6
  • Step 1.pdf
    104.7 KB · Views: 10
  • result.pdf
    201.1 KB · Views: 5
  • 8-bit_Result.pdf
    94.9 KB · Views: 8

astrogull

New member
Joined
Apr 26, 2009
Messages
29
Reaction score
1
Points
3
The picture you send in the thumbnail E10B18T37P16.png is 16-bit RGBA, not grayscale, so in color; more over it has transparency. So the program sees it as elv_mod (A) and in color (RGB) when importing it. You can check this by dragging the image in centre field (thumbnail). Also the layer is changed to Surf (my fault, should be either Mask or Cloud).
You can change the image to 16-bit grayscale: Uncheck everything, Import PNG under tab File, uncheck everything again and export as PNG. (you can check the Export-Import metafile, now the colormap = 0). The elv tile itself is ok, only needs to be scaled.

About the location of the map10b18t37w64h64. As you can read in PlanetTextures.pdf in the Orbiter documentation level 10 has (0-63=) 64 bands with (0-127 =) 128 tiles. A 64x64 map can only be placed in level 10 in band 0 and in tile 64 at most. If you insist in placing the map at this location L10B18T36 it must be in level 11 band 36 tile 74 (is x2 in the next level according to a quad tree structure, l10b18t37 split in 2 bands with 2 tiles each at l11b36t74, l11b36t75 and l11b37t74, l11b37t75). Level 4 has 2 tiles in band 0 left and right hemisphere, from then on each tile split in 4.
In level 10 your map will cover a 32x32 area.
Or you can crop your map to 64 tiles width and 46 tiles height (256x64+3=16387, 46x256+3=11779).
 

Attachments

  • screen.jpg
    screen.jpg
    93.1 KB · Views: 18
Last edited:

Thinker55

Donator
Donator
Joined
Sep 20, 2015
Messages
31
Reaction score
0
Points
6
Color, huh? Okay...

Thank you for pointing out the color issue. Apparently, Gimp automatically creates RGBA unless you tell it not to. I was unaware. I discovered where the settings were and corrected the problem, and am now getting reasonable results. I will take your recommendation for adjustment of the map and try to move on to creating splits. :hailprobe:

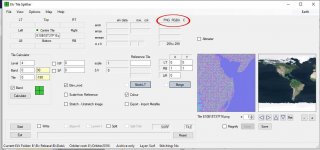
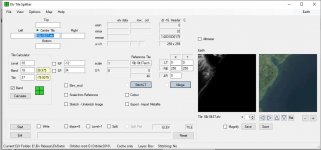
So, I now have an imported tile that meets spec. But there appears to be no way to save it in place of the previous tile. The save button stays greyed out and the old garbage tile (and if you have looked at that tile, you KNOW it is garbage -- it is incorrect in placement and in poor resolution) continues to be displayed, even after I rename it and replace it in the extracted tree structure. I have the display set to cache only, and this continues to be the case. Do I have to replace it in the archive? Tileedit sees the new tile just fine...

I am trying to puzzle out your response regarding the map. I'm hearing it is too big. Ultimately, of course, I probably only need a couple of tiles at level 16 or 17. I will look to re-scale the map per your recommendation, but I'm hearing that I'm doing something wrong. Do you have a recommendation?

I have read and re-read your documentation and continue to be baffled in places. I'm certain that you think I'm a complete idiot, but the case descriptions are not accompanied by a description of the process itself. I end up not understanding WHY you are doing what you are doing, and in some cases, exactly what you are attempting to accomplish. I keep trying things that you appear to be recommending and having the application just sit there and not provide an error message, but not do anything. Clearly, I'm extremely frustrated. I'm sure you have a fine tool here - but I can't seem to figure out how to use it.

---------- Post added at 10:14 PM ---------- Previous post was at 07:09 PM ----------

I admit that I had not attempted to follow the Mars examples until now, trying to move directly to using the tool on Earth. On Page 5, you mention this elevation file, col15bg0.elv. There is a very general description of how it was generated. But there is no example file, and the description is VERY general. Was it supposed to be included? I also have the old ElevTileSplitter and extracted it, too, but there is no elv file by that name. You also talk about using a tile for Ref Alt -- but that field is not available initially. I managed to surface it by dragging tile 000252 to the Reference Tile field and clicking Scale from Reference. At that point, I could do the Import from PNG step (something I have a lot of practice at, even if I can't seem to store the results...)-- but at that point, I was stopped by the lack of the col15bg0.elv file.

Was this file supposed to be provided?
 

astrogull

New member
Joined
Apr 26, 2009
Messages
29
Reaction score
1
Points
3
When you/re stuck in the program press Reset and check the settings under Options. Certain checkboxes block certain actions (manual, p.20). Check uncheck Split will also help.

Do Case Mars. (as the manual on p.1 in About says). The instructions are step by step outlined in the manual (p.29) and in the video. It covers almost all of the features of the program. The necessary maps are in Examples subfolder: case Mars.elv and case Marssrf.png, therefore col15bg0.elv is no longer needed. Use VLC player to slow down the speed and for chapter selection (tab Playback).

Ref alt(itude) is a quick way to enter emin-emax, so for scaling and stretching only.

As for the 64x64 map, I forgot to mention that a 64x64 map at level10 covers half the planet, 20,000x20,000 km for Earth, a level17 tile covers an area of 2x2 km with a resolution of 8 m per height point.
Wikipedia says Wallis island area is 96 km2, so a 5x5 map covers 100 km2, location -13.29 S, -176.20 W. (Google). Enter this location in Tile Calculator (uncheck band first), press Calculate, you see a crosshair in the Surf box. Press + several times under Surfbox, at level8 it starts to appear. Press + to level14. This tile covers almost the complete island. Set crosshair at left top in surf box and press + to level17. Tile has band 4696 tileno 168. So a 8x8 map at this location: l17b4696t168. To be safe make a 10x10 elv map at l17t4695t167.

When the elv map is ready, set archive selector to archive+cache, orbiter folder to orbiter root and planet to Earth, press Reset. Enter the location in Tile Calculator l17, b4695, t167 for 10x10 elv map. Then check Split and Write and press Start. Press Calculate a this location, you will say the new tiles.

As for the greyed out buttons, there is logic behind this. When splitting, stitching etc. focus is on centre field, you do not want to loose it when navigating in the surfbox, only to see a suitable location is allowed. When you split you will not magnify. Stitch to lower tile and Merge needs a background, the foreground may not be in the archive or cache. Repair borders excludes splitting, because you use the same Write and Start buttons. You can scale and split at the same time, scale a left tile and turn it to dtype=8 (only when emax-emin < 255). Import and Export is for centre field only. And so on. Read the tooltips. Read PlanetTextures.pdf.
 
Last edited:

Thinker55

Donator
Donator
Joined
Sep 20, 2015
Messages
31
Reaction score
0
Points
6
Sorry. Wallis Island was a momentary lapse on my part. I'm working on Wallops Island, in Virginia, vic 39N 75W. The tile reference I provided would show you the elv tile I'm looking to replace -- and one look at it explains why. I was unaware that the V2 information invalidated the main manual where the Case Mars was concerned. I will work my way through this.

Thank you.
 

Thinker55

Donator
Donator
Joined
Sep 20, 2015
Messages
31
Reaction score
0
Points
6
More issues with Case Mars

Sadly, I'm back. I got to step 2 on Page 29. Press Select, check Elev Data...
I can't check Elev Data -- It's greyed out and I get an error message that there is no tile in the cache. That's not a surprise... I DO have Cache+Archive selected. I created an Elev folder under Textures\Mars and Elev is pointed at that. There are no tiles in it -- and from your instructions, there are not supposed to be. I tried moving the Elev directory several places, including Mars, and Elv Data under the Tile Splitter directory and got the same answer.
The video shows a different result -- but I've been having cache display problems all along.
When I look at the video, your elevation tile 17b4832t9048.elv looks different than mine. Did you have tiles from a texture upgrade to Mars in your cache, perhaps?
 

Attachments

  • Compose Map.pdf
    29 KB · Views: 13

astrogull

New member
Joined
Apr 26, 2009
Messages
29
Reaction score
1
Points
3
1. Set archive selector to archive only. As you have read in PlanetTextures.pdf, p.4 and in the manual, p.18, General Information, 3-rd paragraph, at last level 4 elv- and surftiles are necessary (level1 to 3 not). You can easily make them from the elev.tree and surf.tree when you want to use cache. PlanetTextures.pdf, p.3 explains where to put them, f.i Textures\<planet name>\<layer>\04\000000\000000.<ext> in the orbiter root.

2. I noticed your current elvfolder is set to orbiter\textures. That is asking for trouble sooner or later (manual, p.2, First Start). Manuals do have a reason.

3. Yes.
 
Last edited:

Thinker55

Donator
Donator
Joined
Sep 20, 2015
Messages
31
Reaction score
0
Points
6
The Wallis Island description was somewhat useful

...in that I could more or less follow it, where the Mars example failed. I believe the direction to empty the cache totally is the problem there. In any case, this is my problem: I'm working with tile 10b18t37. It's ugly, for some reason -- looks like it was already blown up from level 8 or 9. I have a replacement tile png at the proper size, color resolution, etc., thanks to your previous assistance. All I really want to do is replace the existing tile so when I go higher I will have something to work with. Import works fine -- I get an elv tile from the png file and it looks great. I discovered that if I want a proper tile placed in the proper folder, I need to do a split, even though there really is no 'split' activity required. I get a tile in the proper location that appears to be correct for size, etc. But then the Elv Tile Splitter absolutely refuses to read it from the cache, even if I set it to cache only! Instead, it goes right back to that ugly tile in the archive! Can you help me fix this? I'm attaching my png and my png.hdr. Other apps seem to recognize the tile produced -- tileedit does, for instance. But the Elv Tile Splitter won't recognize it's own work in this instance and until I can get it to, I cannot move forward. I can't use the tile, even though there seems to be nothing wrong with it, because the app refuses to recognize it and goes back to the archive -- or SOMEWHERE -- because when I tell it not to read the archive, I STILL get the ugly tile! Please help me get past this!
 

Attachments

  • 10B18T37.png
    10B18T37.png
    21.4 KB · Views: 7
  • 10B18T37.png.hdr.txt
    146 bytes · Views: 4
Last edited:

Thinker55

Donator
Donator
Joined
Sep 20, 2015
Messages
31
Reaction score
0
Points
6
1. Set archive selector to archive only. As you have read in PlanetTextures.pdf, p.4 and in the manual, p.18, General Information, 3-rd paragraph, at last level 4 elv- and surftiles are necessary (level1 to 3 not). You can easily make them from the elev.tree and surf.tree when you want to use cache. PlanetTextures.pdf, p.3 explains where to put them, f.i Textures\<planet name>\<layer>\04\000000\000000.<ext> in the orbiter root.

2. I noticed your current elvfolder is set to orbiter\textures. That is asking for trouble sooner or later (manual, p.2, First Start). Manuals do have a reason.

3. Yes.
1. I don't see how I would have ever guessed that I needed to set to archive only. Your instructions say different -- they say Cache+Archive. Given that Cache+Archive includes the Archive, I'm wondering why that doesn't work. Frankly, anyone following the directions as written will hit the wall. I have the entire Earth tree already extracted to cache in my test installation, so I know all about that. I DO read the instructions.
2. The screenshot displays a location I tested after the initial one failed. I tried several locations in case there was some magic directory where the instructions worked. I'm aware that it was mildly dangerous -- but I had nothing in cache there. The Elv Tile Splitter doesn't post to the archive, as I understand it. Am I incorrect?
3. Thought so. I went looking for the Hi Res Mars -- and didn't find it. But OHM is in sad shape. Happily, steps are being taken.
 

astrogull

New member
Joined
Apr 26, 2009
Messages
29
Reaction score
1
Points
3
The Wallis Island description was somewhat useful
To read from cache you need at least a surf tile at that location l10b18t37 and tile calculator, calculate with that location entered. If the elev tile is also present all child tiles are resizes of this parent when not present and can be read. Surf tiles are necessary for navigation. All tiles are placed in the current elev folder.
With split the tiles are placed in the current elev folder and you have to copy them to the orbiter \textures\ planet \ etc. location. With single tiles you don't need to split but then you have to rename them and place them yourself, making a level and band folder.

Today at 4:01 AM
1. Manual, p.18: "The link with Orbiter Archive or Cache tiles will only work when at least surf tiles are present in level 4. If the Elev layer is selected (default at start), then they must be present in at least level 4. "
You have a point though about cache+archive. In the next update/release that will be fixed, showing archive when present and cache is not, else cache in cache+archive.
In the meantime fill the elev and surf folder in orbiter\textures\mars with the necessary leve 4 tiles when using cache, see zip file in case youbhaven.t done this already

2. No, but it can pollute all other folders depending on the current elev folder. So remove all junk files from orbiter.

3. Nice to have but not necessary, download at http://orbit.medphys.ucl.ac.uk/
 

Attachments

  • ElvData.zip
    413.4 KB · Views: 11
Last edited:

Thinker55

Donator
Donator
Joined
Sep 20, 2015
Messages
31
Reaction score
0
Points
6
I have a full cache in the test installation -- ALL Earth tiles. The surf tile for l10b18t37 is present. That's very good information to know -- but as I said, the surface tile is present in cache. So I continue to be baffled as to why the Tile Splitter refuses to present the elv tile in cache, even though it created it! I thank you for thoughtfully including the Mars tiles. I will work the exercises again. I got something that looked like a window frame at one point while working the exercises last night.
 

Thinker55

Donator
Donator
Joined
Sep 20, 2015
Messages
31
Reaction score
0
Points
6
So, back to my issue with 10b18t37.elv. I set the archive selector to cache only to force the ElvTileSplitter to read the cache. The attachments show the result -- it flatly refused. Again, I DO have a Surf tile for this in cache. I have a full, extracted tile set in the Textures\Earth\directory. It seems the ElvTileSplitter doesn't want to read the cache under any circumstances for some reason. I actually went as far as to copy the level 4 and 10 elv and surf directories from the Orbiter instance Texture directory to the program cache ElvData\Elv and Surf directories. The program won't read the cache. I hope this helps you troubleshoot -- I'm pretty sure there's an issue here.
 

Attachments

  • cache.pdf
    25.4 KB · Views: 3
  • Splitter Status.pdf
    5.7 KB · Views: 2

astrogull

New member
Joined
Apr 26, 2009
Messages
29
Reaction score
1
Points
3
Cache.pdf: that is the wrong folder. If you have orbiter2016 installed as in splitterstatus.pdf i.e orbiter root E:\..\..\..\orbiter2016test, then copy them to ..\orbiter2016test\textures\earth\Elev\10\000018\000037.elv/. Also for surf l101b18t37.dds in ..\Earth\surf\. Copy also the level4 elv- and surf tiles to this folder, then you don't need the l10b18t37 surftile

Elv tile splitter is linked to orbiter root. The current elev folder is your working environment, nothing else. With tile calculator or navigation arrows you can scroll through the orbiter archives and cache, when orbiter2016 is properly installed and the link is made with orbiter root, planet and archive selector set. This means you have to copy the tiles from the current elev folder to orbiter\textures\earth\Elev etc. I noticed that tileedit does copy directly to elev_mod when importing a png tile.
 

Attachments

  • dir4and10.jpg
    dir4and10.jpg
    51.3 KB · Views: 12
  • screen10b18t37.jpg
    screen10b18t37.jpg
    131.7 KB · Views: 11
Last edited:
Top